
How to Plan a Lithium Upgrade Without Buying the Wrong Battery
A viable match must fit the compartment, meet controller current needs, use an approved charge profile and correctly power 12V accessories.
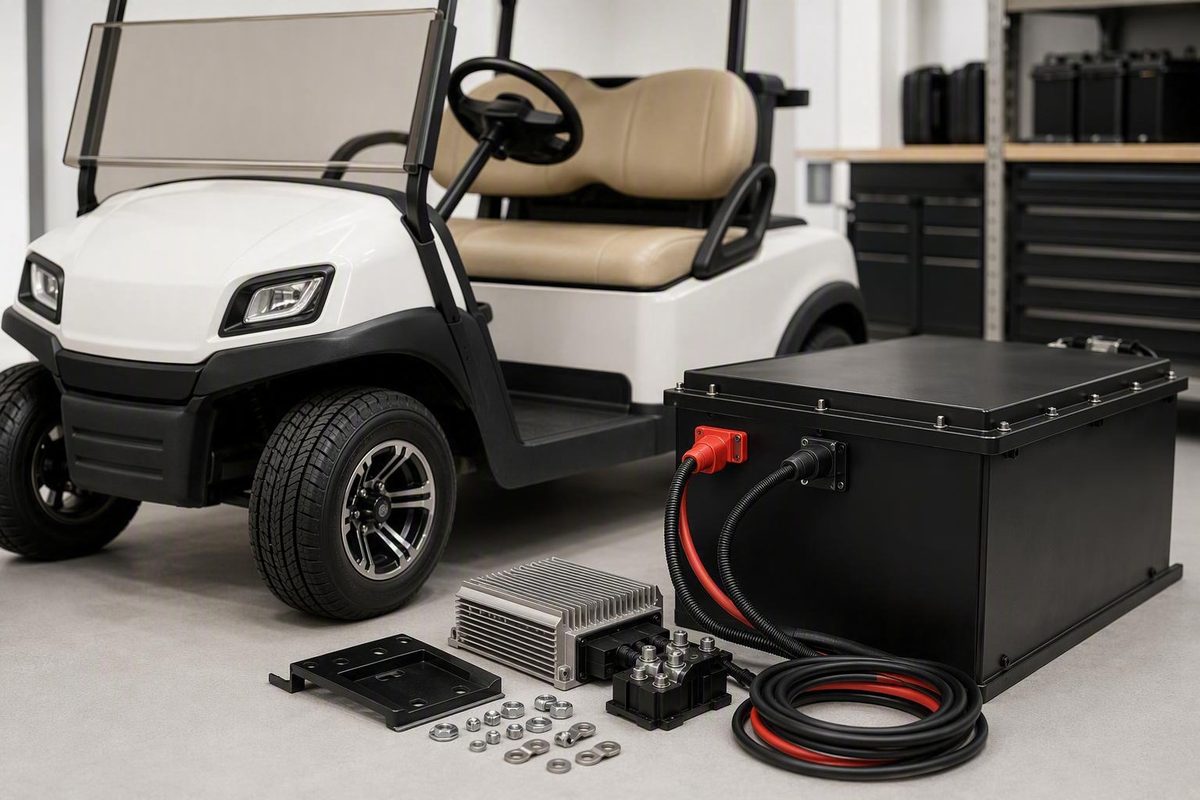
A golf cart lithium conversion is not simply a battery swap. Matching “36V,” “48V,” or “72V” on a product page to the voltage printed on the cart is only the first compatibility check.
The selected battery must fit the compartment, meet the controller’s documented current requirements, use an approved charging profile, integrate with the cart’s electronics, and supply any 12V accessories correctly.
Before buying anything, document the cart, compare batteries by energy and output rather than amp-hours alone, and calculate the complete installed cost. If current limits, wiring, charging, protection, or electronics integration cannot be verified for the exact cart and battery, pause rather than improvise.
Is converting your golf cart to lithium worth it?
Whether lithium is worthwhile depends more on how you use the cart than on a universal list of advantages.
Start with six questions:
- How often and how far is the cart driven?
- How much inconvenience does lead-acid watering and corrosion control create?
- Is the existing lead-acid pack still serviceable?
- How long do you expect to keep the cart?
- Will the cart be charged or stored in cold conditions?
- Can the budget cover the battery and every required supporting component?
Lithium sellers and conversion advocates commonly promote lower weight, faster charging, less routine battery maintenance, steadier power delivery, and longer service life. These are recurring commercial claims, but the available evidence does not establish universal figures for weight savings, charging time, service life, or financial payback. Results depend on the battery, charger, cart, climate, payload, terrain, and driving pattern.
The tradeoffs are more immediate. Lithium usually costs more initially and may require a different charger, state-of-charge monitor, DC-to-DC converter, mounting hardware, or charge-port work. Integration can be model-specific. Charging may be restricted at low battery temperatures, subject to the selected manufacturer’s instructions. A dealer overview identifies usage, budget, climate, compatibility, and installation requirements as central considerations and presents waiting until the lead-acid pack reaches the end of its service life as a reasonable option (Makin’ Traxx’s conversion overview).
Converting now may make sense when:
- The lead-acid pack already needs replacement.
- The cart is used frequently or travels substantial daily distances.
- Watering, cleaning, or charging interruptions create meaningful inconvenience.
- You expect to keep the cart for several years.
- A battery or kit is documented for the exact cart and operating conditions.
- You can afford the complete conversion without relying on an assumed payback.
Waiting may make sense when:
- The current batteries remain serviceable.
- The cart is used only occasionally or seasonally.
- Upfront cost matters more than reducing maintenance.
- The cart may be sold soon.
- Controller, charger, wiring, or model-specific information is unavailable.
- Cold-weather charging restrictions would be difficult to manage.
Frequent users and fleets may place greater value on reduced watering and shorter charging interruptions because those tasks recur across many operating hours or vehicles. A seasonal owner making short, infrequent trips may receive similar practical benefits but take much longer to justify the expense.
There is no need to discard a serviceable lead-acid pack merely to follow a technology trend. Maintaining it correctly and scheduling the conversion for its eventual replacement can preserve its remaining value while allowing more time to research the next system.
Use this decision test: proceed to compatibility research only if you expect to keep and use the cart long enough to value the upgrade and can obtain complete battery, BMS, charging, mounting, and installation specifications. If either condition fails, wait.
Build a cart compatibility worksheet before shopping
Do not begin with a battery advertisement. Begin with the vehicle.
Record the following information in one place:
| Cart information | What to record |
|---|---|
| Identity | Make, exact model, model year, and serial number |
| Traction system | Documented voltage and original battery configuration |
| Controller | Manufacturer, model, battery-current requirements, and programming |
| Charging system | Charger make, model, output profile, and onboard or offboard location |
| Battery compartment | Length, width, depth, obstructions, and tray condition |
| Terminals | Required location, cable reach, and vertical clearance |
| Mounting | Existing hold-downs, hooks, brackets, spacers, and attachment points |
| Accessories | Lights, audio, USB outlets, fans, heaters, and other low-voltage loads |
| Electronics | Onboard computer, CAN connections, gauge, solenoid, and charge-port wiring |
| Modifications | Lift, larger tires, rear seat, utility body, controller, or upgraded motor |
Confirm system voltage from the cart manual, vehicle labels, and applicable wiring information. Battery count can provide a clue: six 8V lead-acid batteries commonly indicate a 48V cart, while six 6V batteries commonly indicate a 36V cart. The featured DIY project documenting those arrangements also warns, by implication, that its parallel full-voltage replacement layout belongs to its selected system rather than every conversion (Rogue Engineer’s documented conversion).
Battery count should never override the vehicle documentation. A modified cart or an unusual battery arrangement can make a visual assumption unreliable.
Market voltage and nominal voltage are not always identical. A LiFePO4 battery advertised for a “48V” cart may be rated at 51.2V nominal. That does not automatically make it incompatible with a 48V-class cart. It means the buyer must verify the complete operating-voltage range and required charge profile. Redodo, for example, specifies a 58.4V charger for its particular nominal 51.2V battery; that is a product-specific specification, not a universal setting for every 48V conversion (Redodo’s conversion and charging example).
Voltage matching alone does not answer these questions:
- Will the battery fit without contacting the seat base or body?
- Are the terminals accessible and protected?
- Is the specified mounting system compatible with the tray?
- Can the BMS meet the controller’s documented continuous and peak demand?
- Is regenerative-current acceptance required and documented?
- Is the charger’s profile approved for the battery?
- Will the onboard computer, solenoid, and charge receptacle continue to work?
- How will 12V accessories be powered?
- Does the system require CAN communication or software configuration?
A GC2- or GC8-footprint lithium battery may fit existing battery wells and simplify the hold-down arrangement. It is still only a physical fit. Matching the old footprint does not establish output, charging, wiring, or electronic compatibility.
Make, model, and year matter enough that retailers divide kits by vehicle application. Fleet Lithium’s catalog, for example, shows separate listings for selected E-Z-GO TXT and RXV carts, Club Car Precedent, Tempo, and DS carts, and Yamaha Drive G29 and Drive2 carts. Its visible model-year ranges also vary by listing, so a broad statement such as “fits major brands” is not enough (Fleet Lithium’s model-filtered catalog).
Even a model-specific product title is only the start of verification. Check the individual listing and installation documentation for the exact year, controller, battery compartment, and included hardware. Ask the seller to confirm compatibility in writing if any of those details are missing.
Use this checkpoint before ordering:
- The cart’s system voltage is documented.
- Controller current requirements have been obtained.
- Battery dimensions and terminal clearances have been measured.
- Continuous, peak, and regenerative-current questions are resolved.
- The approved charger or charging profile is identified.
- Mounting and accessory-power plans are documented.
- A wiring diagram exists for the selected battery architecture.
- Exact model and model-year compatibility has been confirmed where required.
If both sides of the comparison—the cart’s requirements and the proposed system’s specifications—cannot be documented, the decision is no-go.
Choose capacity and BMS output—not amp-hours alone
Battery listings emphasize amp-hours because the number is easy to compare. Amp-hours alone do not tell you how much energy the battery stores or whether it can deliver the controller’s required current.
The basic terms are:
- Voltage: The electrical potential of the battery system.
- Amp-hours: A measure of charge capacity.
- Nominal watt-hours: Nominal voltage multiplied by amp-hours.
- Usable energy: The portion available within the manufacturer’s operating limits.
- Continuous BMS current: The current the BMS is specified to pass continuously.
- Peak BMS current: A higher current allowed for a defined short duration.
Nominal energy is calculated as:
Nominal volts × amp-hours = nominal watt-hours
Using that calculation, a nominal 51.2V, 100Ah battery contains approximately 5,120Wh, or 5.12kWh. A 38.4V, 100Ah battery contains approximately 3,840Wh, or 3.84kWh. Equal amp-hour ratings at different voltages therefore do not represent equal nominal energy. Commercial catalogs themselves separate batteries by nominal voltage, amp-hours, and kilowatt-hours rather than treating amp-hours as a complete specification (BigBattery’s voltage and energy listings).
Nominal energy is not automatically usable energy.
That is why a fixed mileage promise based only on amp-hours is unreliable. Range planning should account for:
- Passenger weight
- Cargo and rear-seat use
- Hills, turf, sand, and other terrain
- Average and maximum speed
- Stop-and-start driving
- Lift kits and larger tires
- Motor or controller modifications
- Tire condition and pressure
- Lights, audio, USB loads, and other accessories
- Ambient and battery temperature
- Desired end-of-trip reserve
Vendor range claims may use different or unstated test conditions. Before relying on one, ask what payload, terrain, speed, tires, temperature, accessory use, and remaining reserve were assumed.
Retail guidance can provide a starting point, but it is not an engineering rule. Extreme Kartz generally directs stock two-passenger carts toward roughly 60–65Ah systems, four-passenger or modestly modified carts toward approximately 105–120Ah, and heavily loaded or substantially modified carts toward larger systems. The same retailer emphasizes cart configuration and BMS output rather than capacity alone (Extreme Kartz’s commercial sizing guide).
BMS output deserves equal attention. A high-capacity battery may still be unsuitable if its current limits do not meet the controller’s documented requirements. Obtain the controller’s maximum battery-current specification, including any stated peak duration. If regenerative braking is used, ask the cart, controller, and battery manufacturers to confirm the relevant charging-current requirements.
Product listings illustrate why capacity and output must be recorded separately. Extreme Kartz identifies a 250A continuous BMS for particular 105Ah and 150Ah products, while Lithium Rhino advertises a 300A BMS for selected 170Ah systems. These are seller-published specifications for particular products, not recommendations for every cart (Lithium Rhino’s listed kit specifications).
Complete this worksheet for every candidate:
| Capacity and output field | Candidate specification |
|---|---|
| Market voltage class | |
| Nominal voltage | |
| Amp-hour capacity | |
| Nominal kWh | |
| Manufacturer-stated usable energy | |
| Continuous BMS discharge current | |
| Peak current | |
| Permitted peak duration | |
| Maximum charging current | |
| Regenerative-current acceptance | |
| Controller continuous demand | |
| Controller peak demand and duration | |
| Estimated accessory load | |
| Planned energy reserve | |
| Low-temperature charging and use limits |
Reject a battery when the information needed to compare its current limits with the controller cannot be obtained.
Decide between one pack, modular batteries, and a complete kit
Golf cart lithium systems generally use one of three architectures:
- One purpose-built full-system-voltage pack
- Multiple manufacturer-approved full-voltage modules connected in parallel
- Lower-voltage batteries connected in series
A single full-voltage pack can reduce the number of high-current battery interconnections because the cart connects to one battery assembly. Physical size, terminal location, mounting, monitoring, service arrangements, and required communication still vary by product.
A modular full-voltage system uses two or more batteries that each supply the cart’s required voltage. When expressly approved, parallel connection increases total capacity while leaving bank voltage unchanged. RELiON, for example, describes a product-specific system using two to six 48V, 30Ah modules in parallel. Its advertised bundle includes two batteries, spacers, a gauge, a remote button, and an approved charger (RELiON’s modular conversion guidance).
Do not generalize that arrangement to another product. A different battery may prohibit parallel use, limit module count, impose requirements for cabling or module condition, or require communication connections.
The third architecture uses lower-voltage batteries in series to create the required system voltage. A retailer warns against improvised banks made from four generic 12V lithium batteries in series, citing imbalance and charging concerns. Treat that as a commercial warning against unsupported arrangements—not proof that every manufacturer-approved series system is unsuitable.
For every series or parallel design, obtain written answers to these questions:
- Is the exact battery approved for the arrangement?
- What are the minimum and maximum module counts?
- Are there module-age or state-of-charge requirements?
- What cable or busbar layout is specified?
- What protective devices are required?
- Are communication or balancing connections required?
- What charging method is approved?
- Is later expansion permitted?
It can also create one support route if the components do not work together.
“Complete,” “drop-in,” and “plug-and-play” are not technical specifications. Review the included-parts list line by line. A kit marketed broadly may still need different mounting or charge-port components for different carts.
Use a common comparison table:
| Comparison field | System A | System B | System C |
|---|---|---|---|
| Architecture | |||
| Nominal voltage | |||
| Nominal kWh | |||
| Manufacturer-stated usable energy | |||
| Continuous BMS current | |||
| Peak current and duration | |||
| Dimensions | |||
| Weight | |||
| Mounting method | |||
| Monitor type | |||
| Approved expansion | |||
| Included charger | |||
| Included cables and protection | |||
| Included converter or adapter | |||
| Warranty terms | |||
| Complete delivered price |
Most importantly, obtain the wiring diagram for the exact architecture. Do not copy the former lead-acid series layout when installing full-voltage parallel modules. Do not copy another vendor’s busbar arrangement when the selected product uses a single pack or a manufacturer-approved series bank.
Price the complete conversion, not just the battery
Build a bill of materials before comparing offers.
Core system items to verify:
- Compatible lithium battery or modules
- Approved charger, or documented approval for the existing charger
- Secure mounting hardware and hold-downs
- Required main positive and negative cables
- Manufacturer-specified protective devices
- Suitable connectors and terminal covers
- Supported state-of-charge monitoring
- Cable-routing hardware
- Exact installation and wiring instructions
Some of these components may be built into the selected system rather than purchased separately.
Conditional items may include:
- Battery spacers
- Busbars
- Charge-port adapter or replacement receptacle
- Onboard-charger mounting
- DC-to-DC converter for 12V accessories
- CAN or communication harnesses
- Controller programming
- Tray repair or corrosion treatment
- Replacement cables or solenoid
- Shipping or hazardous-material charges
- Professional installation
- Lead-acid removal and recycling
Kit contents vary. Lithium Rhino advertises packages that include a battery, charger, cables, mounting brackets, touchscreen display, isolated 12V converter, charge-port adapter, hardware, and lead-acid removal equipment. Other products may be battery-only even when their photographs show surrounding parts.
The following prices are seller-published snapshots reviewed on August 10, 2026, not quotes or market averages. Lithium Rhino displayed 48V offerings from a $1,299 50Ah kit to a $3,499 170Ah kit; the listings included sale pricing that may change.
BigBattery separately displayed 48V configurations spanning 1.63kWh to 20.48kWh, with various starting and multi-module prices. Those configurations are not directly comparable because their energy, module count, and kit contents differ.
A documented affiliate-supported DIY project reported $1,469 for its featured two-battery 48V kit and $299 for the charger, producing a stated total of $1,768. That was a product- and time-specific installation example, not a universal conversion price.
Redodo’s commercial guide estimated the following categories:
- $800–$2,000 for a 48V lithium pack
- $150–$300 for a charger
- $50–$200 for accessories
- $100–$300 for professional installation
These are seller estimates and may omit shipping, taxes, fabrication, corrosion repair, controller work, or model-specific electronics. They were displayed on the same commercial guide cited earlier and should be treated as planning ranges rather than quotes.
Use this worksheet:
| Cost item | Quoted cost |
|---|---|
| Battery or modules | $ |
| Charger | $ |
| State-of-charge monitor | $ |
| DC-to-DC converter | $ |
| Required protective devices | $ |
| Main cables, connectors, and busbars | $ |
| Mounting tray, brackets, and spacers | $ |
| Charge-port or wiring adapters | $ |
| Communication harness or software | $ |
| Shipping or hazardous-material fees | $ |
| Taxes | $ |
| Installation labor | $ |
| Corrosion or tray repair | $ |
| Lead-acid removal or recycling | $ |
| Contingency | $ |
| Complete installed total | $ |
Compare delivered systems with equivalent voltage, usable-energy information, BMS output, and included hardware. A sale, preorder, or “starting at” figure may represent a different capacity or module count.
Apply the same discipline to warranties. Review:
- Full versus prorated coverage
- Repair, replacement, or credit as the remedy
- Transferability
- Return freight and shipping responsibility
- Diagnostic and installation labor
- Commercial-use restrictions
- Approved-installer requirements
- Required chargers and accessories
- Temperature and storage restrictions
- Current-limit exclusions
- Series or parallel restrictions
Do not assume that a longer headline term provides broader coverage.
Verify the charger, gauge, accessories, and cart electronics
The governing charger rule is simple: reuse an existing charger only when its voltage setpoints, charging algorithm, and operating behavior are expressly approved for the selected battery.
That avoids two opposite mistakes. Do not assume every lead-acid charger works with lithium, and do not assume every existing charger must be discarded.
The original state-of-charge gauge may also be unsuitable. A voltage-based lead-acid gauge may not represent remaining lithium energy accurately because the supported monitoring method can differ. Depending on the selected system, the manufacturer may specify:
- A shunt-based monitor
- A BMS-connected display
- A CAN-based gauge
- A Bluetooth application
- A compatible dash display supplied with the kit
Accessories need a separate power plan. Lights, stereos, USB outlets, and other 12V equipment should not be assumed compatible with a 36V-, 48V-, or 72V-class traction connection. A correctly specified DC-to-DC converter may be required. Vatrer’s catalog, for example, lists dedicated 36V-to-12V and combined 48V/72V-to-12V converters alongside batteries and chargers; the correct input range, output rating, mounting, and protection remain application-specific (Vatrer’s battery and accessory catalog).
Ask the battery manufacturer for the supported accessory-power method.
The integration plan must also address:
- Factory charge-receptacle compatibility
- Onboard versus offboard charger location
- Onboard-computer behavior
- Solenoid and controller wiring
- Tow/run circuit requirements
- CAN communication
- Battery wake-up or remote switching
- Controller programming
- Software or firmware requirements
- Regenerative braking behavior
A Golf Cart Tire Supply installation guide disconnects factory charge-port wiring from the controller and solenoid for its featured kit and substitutes an onboard charger. Those instructions are tied to that kit and cart configuration, not to lithium conversions generally (Golf Cart Tire Supply’s kit-specific guide).
Cable reuse is also conditional. Do not guess at cable size or protective-device ratings; obtain them from the applicable cart, controller, battery, and kit documentation.
Send unresolved questions to the relevant manufacturers:
- What battery current must the controller supply in normal and peak operation?
- What regenerative current must the battery accept?
- What protective device is specified, and where does the manual place it?
- What cable size and temperature rating are required?
- What connector rating is required?
- What is the exact terminal-torque specification?
- What low-temperature charging restrictions apply?
- Is automatic charge cutoff or battery heating required?
- Is CAN communication required?
- Will the onboard computer and original charge port remain functional?
- Is controller programming required?
Do not order until the answers describe one coherent system.
Use a safety-first installation workflow
This section is an overview, not a universal procedure. The exact cart, controller, battery, charger, and kit manuals must control wiring sequence, cable requirements, protective devices, terminal torque, mounting, and charge-port changes. The available installation evidence is commercial rather than an authoritative electrical standard, so unresolved requirements are reasons to stop and seek qualified help.
1. Prepare and document the cart
Follow the cart manufacturer’s shutdown and tow/run instructions. Commercial installation guidance commonly calls for switching the ignition off, applying the parking brake, using tow mode where applicable, isolating charging power, and photographing or labeling connections before removal (LiTime’s high-level conversion workflow).
Use the personal protective equipment specified by the cart and battery documentation. Disconnect cables only in the sequence required by the cart manual.
2. Remove the lead-acid system
After the pack has been isolated according to the cart documentation, remove the specified cables, hold-downs, and watering equipment. Lead-acid batteries are heavy; retailer installation guidance advises keeping them upright and using assistance or an appropriate lifting strap during removal (GoBatteries’ removal and installation example).
Send the removed batteries through a battery retailer, cart dealer, recycling facility, or waste service that confirms it accepts lead-acid batteries.
3. Inspect the compartment
Clean the tray and inspect it for corrosion, weakened material, damaged insulation, unsuitable cables, loose mounting points, and areas that could abrade wiring. If the tray needs structural repair or fabrication, stop and have the work assessed before installing the new pack.
4. Mount the lithium battery
Use the tray, bracket, spacer, hook, or hold-down method specified for the selected system. Do not assume that drilling or self-tapping screws are appropriate; suitability depends on the cart structure and kit instructions.
Confirm that the installed battery does not move and that the terminals and cables have the clearances required by the manuals.
5. Wire the selected architecture
Follow the exact polarity and wiring diagram. Install only the protective devices, cables, busbars, covers, and communication connections specified for that system. Route cables according to the cart and kit instructions, and use the battery manufacturer’s terminal-torque value rather than borrowing a figure from another product.
6. Verify before enabling
Complete the pre-start checks required by the manuals. At minimum, the documentation should tell the installer how to verify polarity, pack voltage, secure mounting, terminal protection, cable routing, and communication connections before enabling the battery or returning the cart to run mode.
After startup, check the supported monitor, charger, accessories, controller status, and communication indicators. Complete the initial charge according to the battery manufacturer’s instructions.
Stop the DIY installation if you encounter:
- Unknown controller-current requirements
- Unresolved regenerative-current compatibility
- Missing cable or protective-device specifications
- Custom charge-port rewiring
- CAN or onboard-computer integration without complete instructions
- Severe corrosion or structural damage
- Required fabrication
- Uncertain polarity
- Conflicting documentation
- Repeated BMS or charger faults
- Unexpected heating or damaged wiring
Do not diagnose or repair an abnormal battery condition by improvisation. Isolate the cart only as directed by its documentation, keep it out of service, and contact the battery manufacturer, cart manufacturer, or a qualified installer for product-specific instructions.
Validate the conversion and judge the warranty before the first trip
A successful key turn does not prove that the conversion is complete. Validate the mechanical, electrical, charging, monitoring, and accessory systems before normal use.
Use this post-installation checklist:
- [ ] The battery and modules are restrained as specified.
- [ ] Terminals are protected against accidental contact.
- [ ] Polarity has been verified using the documented procedure.
- [ ] Terminals are tightened to the battery manufacturer’s specification.
- [ ] Cables have the required clearance and strain relief.
- [ ] Specified protective devices are installed.
- [ ] The state-of-charge monitor initializes and responds normally.
- [ ] The DC-to-DC converter supplies the intended accessory voltage.
- [ ] Lights, audio, USB outlets, and other accessories operate correctly.
- [ ] The charger starts, progresses, and terminates as documented.
- [ ] No controller, charger, BMS, or communication fault is displayed.
- [ ] The charge port and onboard computer behave as intended.
Follow the selected manufacturer’s commissioning and road-test procedure. Where the documentation permits a test drive, begin in a controlled area and avoid adding hills, high loads, or aggressive acceleration until normal low-speed operation, braking, direction changes, and charging have been confirmed.
After the test, inspect the installation as directed by the manuals. Loose mounting hardware, shifted components, unexpected heating, BMS shutdowns, charger errors, or failed accessories should be investigated before the cart returns to service.
Not every post-conversion symptom points to a failed motor. An inaccurate gauge may indicate an unsupported monitor. For related diagnosis outside the battery pack, see this guide to golf cart solenoid troubleshooting.
Use the fault information and troubleshooting process supplied by the exact battery, charger, controller, and cart manufacturers rather than replacing parts by guesswork.
Keep a conversion file containing:
- Before-and-after wiring photographs
- Battery and charger serial numbers
- Invoices and delivery records
- Product and kit part numbers
- Installation manuals
- Controller details
- Charger model and settings
- Torque and inspection records
- Battery-monitoring app or BMS screenshots
- Configuration and fault-code records
- Warranty registration
- Support correspondence
Headline warranty lengths vary widely. LiTime says its product warranties range from two to five years depending on the product, while BigBattery advertises a 12-year US battery warranty. Those statements establish only the advertised durations, not the quality or scope of coverage.
Review each full warranty for:
- Full versus prorated coverage
- Repair, replacement, or credit as the remedy
- Freight and return-shipping responsibility
- Diagnostic and installation labor
- Transferability
- Commercial or fleet-use exclusions
- Approved-installer requirements
- Required chargers and accessories
- Registration deadlines
- Temperature and storage limits
- Continuous or peak-current exclusions
- Series or parallel restrictions
- Response and escalation procedures
The purchase rule is straightforward: favor the product whose exact compatibility, current limits, charge profile, wiring instructions, support route, and warranty terms can be verified. The largest amp-hour number and longest headline warranty do not compensate for missing system information.
Frequently asked questions
Can a 36V golf cart be converted to lithium?
Yes, when a suitable 36V lithium system is documented for the cart. Commercial catalogs include 36V batteries and conversion kits, but availability does not prove compatibility with a particular make, model, year, controller, or battery compartment.
Confirm the voltage from the cart manual and labels. Battery count may provide a clue, but vehicle documentation remains controlling. Then verify dimensions, mounting, BMS current, controller demand, charger profile, monitoring, accessories, and onboard electronics.
Do not assemble a bank from unrelated batteries unless their manufacturer expressly approves the exact arrangement. Use the wiring diagram for the selected 36V system rather than copying a 48V conversion.
Do I need a new charger for a golf cart lithium conversion?
You need a new charger unless the existing charger’s voltage setpoints, charging algorithm, and operating behavior are explicitly approved for the selected battery.
A matching market-voltage label is not enough. Confirm the connector, charge receptacle, onboard-computer interaction, charger location, termination behavior, and response to a BMS interruption.
If compatibility cannot be documented, include an approved charger in the conversion budget.
How much does it cost to convert a golf cart to lithium?
There is no meaningful universal total without defining system voltage, usable energy, BMS output, cart model, architecture, and included components.
The seller and project figures discussed above range from lower-capacity starting configurations to multi-thousand-dollar systems. They are dated commercial examples, not a stable market average.
Calculate the total for your cart using the battery, charger, monitor, converter, protective devices, cables, mounting hardware, adapters, shipping, taxes, repairs, labor, and recycling. Compare systems with equivalent energy, output, and kit contents rather than comparing headline prices.
Can I reuse my existing battery cables, charge port, and state-of-charge meter?
Possibly, but each component requires separate verification.
Reuse cables only if the selected manufacturer permits it and they meet the documented requirements for size, length, terminals, condition, and routing. Replace cables that cannot meet those requirements.
The charge port can remain only if it is compatible with the approved charger and the cart’s electronics. Instructions to bypass or replace factory wiring are kit-specific.
A voltage-based lead-acid meter may not report lithium state of charge accurately. Use the shunt, BMS display, CAN gauge, application, or other monitoring method supported by the selected battery.
Can I install a lithium conversion kit myself?
A DIY conversion is most defensible when the kit is documented for the exact cart and includes a complete wiring diagram, approved charger, mounting system, specified protection, and accessible technical support.
An owner who can follow the cart and battery manuals, isolate the system as directed, identify polarity, inspect wiring, use specified torque values, and validate charging may be able to install a straightforward cart-specific kit.
Use a qualified installer when controller current is unknown, regenerative charging is unresolved, cable or protective-device requirements are missing, the tray needs fabrication, corrosion is severe, the charge port requires custom rewiring, CAN or onboard-computer integration is involved, or the instructions conflict.
Make the final decision from documentation, not advertising
A successful golf cart lithium conversion should end with a documented compatibility decision, not a brand ranking.
Before purchasing, you should have:
- The cart’s voltage, model, controller requirements, dimensions, and accessory loads recorded
- A battery and BMS whose documented limits meet those requirements
- An approved charging and monitoring plan
- A confirmed mounting and wiring method
- A complete bill of materials and installed-cost estimate
- Full warranty terms
- A clear choice between a documented DIY installation and professional work
If current limits, wiring, protection, charging, mounting, or electronics integration cannot be verified for the exact cart and battery, the correct next step is to pause rather than improvise.