
How to Choose a Charger That Actually Matches Your Cart
The right choice must match battery chemistry, charge profile, permitted current, cart model and year, connector, polarity, signal pins and BMS requirements.
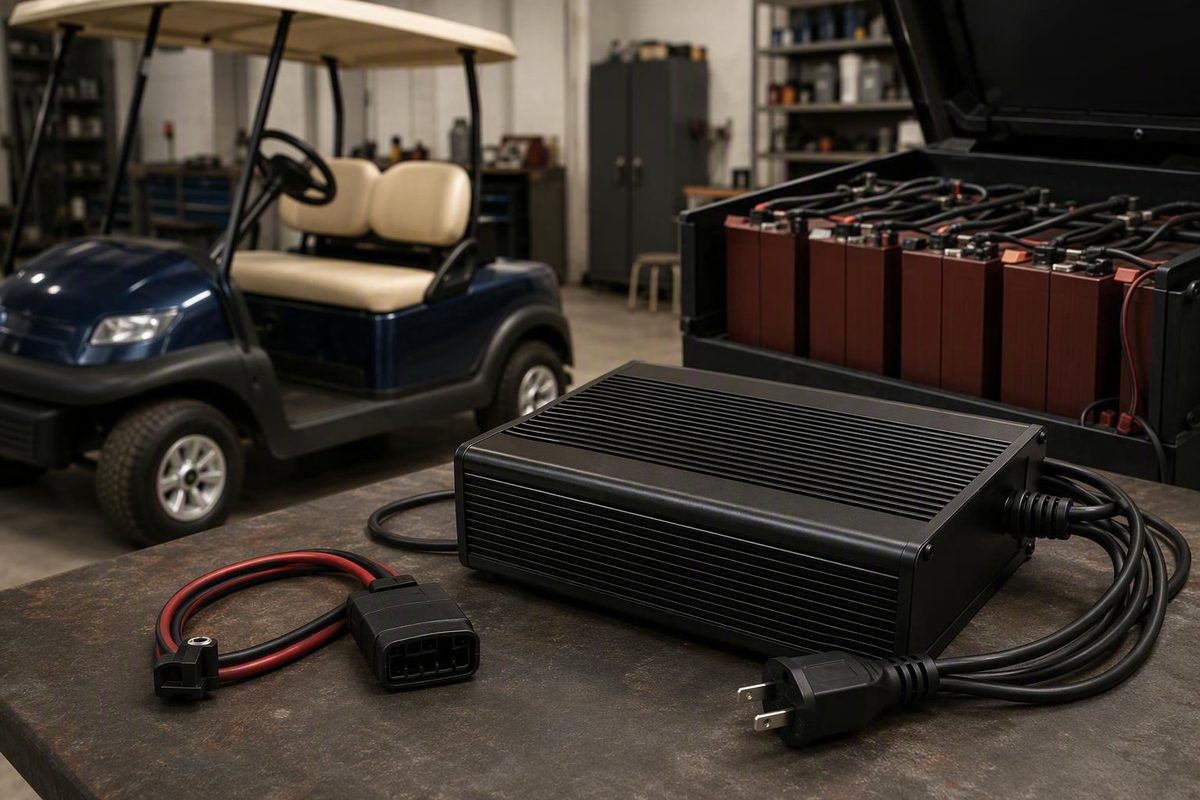
By Chip Delaney, drawing on a decade of municipal golf-cart fleet maintenance Published and listing prices checked: August 14, 2026
A 48V golf cart battery charger is not compatible merely because both the charger and cart carry a 48V label. It must also match the battery chemistry, prescribed charging profile, pack configuration, permitted current, cart model and year, connector, polarity, and any signal-pin, onboard-computer, or battery-management-system requirements.
That distinction becomes especially important after a lithium conversion.
This guide uses manufacturer and seller documentation for product specifications, compatibility statements, and prices. The products have not been independently bench-tested here. Current battery, cart, and charger manuals should control whenever their instructions differ from general buying or troubleshooting guidance.
Use this conservative buying order:
- Match the battery chemistry and charging specifications.
- Confirm the cart-side connector and control architecture.
- Choose a battery-approved charging current.
- Decide between onboard and portable installation.
- Calculate the complete installed cost.
- Compare prices only after every compatibility question is resolved.
Start Here: The Six Details You Need Before Shopping
Do not begin with a marketplace search for “48V charger.” Begin at the battery compartment.
Complete this worksheet before comparing products:
| Detail | What to record | Where to find it |
|---|---|---|
| 1. Battery chemistry | Flooded lead-acid, AGM, gel, LiFePO4, or another specified chemistry | Battery labels, pack label, invoice, or manufacturer documentation |
| 2. Pack configuration | Number of batteries or modules, individual nominal voltage, and series wiring | Battery labels and physical wiring |
| 3. Capacity | Pack capacity in amp-hours, such as 100Ah or 225Ah | Battery or pack data label |
| 4. Cart identity | Make, model, model year, and serial information | Cart identification plate and owner’s manual |
| 5. Connector | Receptacle shape, pin count, keying, and charger-plug type | Cart charging port and existing charger |
| 6. Charging controls | Onboard computer, third-pin signal, interlock, BMS, or another activation requirement | Cart, battery, and charger manuals |
Verify the pack instead of trusting the cart badge
Read every battery label and trace how the batteries are connected. Examples of nominal 48V lead-acid arrangements include six 8V batteries, four 12V batteries, or eight 6V batteries connected in series (Battery Tender’s 48V configuration guide).
Look for cables running from the positive terminal of one battery to the negative terminal of the next. Identify the main pack-positive and pack-negative terminals, but do not disturb the wiring simply to count connections.
Before shopping, photograph:
- Every battery or lithium-pack label
- The complete wiring arrangement
- The cart charging receptacle from several angles
- The existing charger’s specification label
- The existing plug and all of its pins
- The cart model and serial-number plate
These photographs help a seller distinguish between similar-looking connectors and preserve a record of the original wiring.
Red flags
Do not buy a charger based only on:
- The words “48V”
- A plug that appears to fit
- The cart brand alone
- A broad “universal” claim
- A marketplace product title
- The appearance of the old charger
A physically compatible plug does not establish that the charge profile, polarity, signal functions, or battery chemistry are correct.
Match the Charger to the Battery Chemistry and Charge Profile
Flooded lead-acid, AGM, gel, and LiFePO4 batteries are not interchangeable charging applications merely because their packs share a nominal voltage.
For the installed battery, obtain the manufacturer’s current charging instructions and identify:
- Required charging profile
- Maximum charging or full-charge voltage
- Maximum permitted charging current
- Charging temperature limits
- Whether temperature compensation is required
- Whether charging below a specified temperature is prohibited
- Float, maintenance, or storage requirements
- BMS activation or communication requirements
- Approved connector and polarity
If those specifications are unavailable, pause before ordering. A charger title is not a substitute for battery documentation.
Flooded lead-acid
Choose a charger expressly approved for flooded deep-cycle lead-acid batteries. Its charging sequence must match the battery manufacturer’s voltage, current, and maintenance requirements.
Do not apply flooded-battery watering or recovery procedures to AGM, gel, or lithium batteries.
AGM and gel
Confirm that the charger documentation expressly names the installed type and that its voltage limits match the battery manufacturer’s instructions.
BatteryMINDer lists specified 48V products for flooded lead-acid, AGM, and gel systems. That listing does not establish lithium compatibility, and its 2A and 3A products serve a different role from a 15A traction-pack charger (BatteryMINDer’s 48V product range).
LiFePO4 and lithium conversions
A lithium conversion changes the charger decision even when the cart remains nominally 48V. The battery’s nominal voltage is not necessarily the voltage applied near the end of charging.
For example, one marketplace product is described as a 58.4V, 15A, IP67 charger for a 48V/51.2V 16-series LiFePO4 pack. That is a narrowly specified application; it does not make 58.4V correct for every battery advertised as 48V, nor does the listing confirm a connector for a particular Club Car, E-Z-GO, or Yamaha cart (HTAXSCC 16S LiFePO4 listing).
For any lithium pack, verify both the charging specifications and BMS requirements. Do not assume the BMS makes an incompatible charger safe.
Selectable and multi-chemistry chargers
Battery Tender markets its PowerPlus 48V 15A model with selectable lead-acid and LiFePO4 profiles, onboard installation, automatic maintenance operation, and an IP68 rating. The company also lists separate adapters for selected Club Car, E-Z-GO, and Yamaha applications. These are manufacturer claims rather than independent test findings (Battery Tender’s golf-cart charger page).
Before choosing any multi-chemistry unit, ask:
- How is the battery profile selected?
- Is the selected setting visible after installation?
- Can it be changed accidentally?
- Does the charger remember the setting after AC power is removed?
- Does the manual explicitly name the installed chemistry?
- Is the profile approved for the exact battery installed after a conversion?
- Must current or voltage settings also be configured?
The available evidence does not establish how every selectable charger prevents an incorrect setting. The owner or installer must confirm the profile before connecting it.
Chemistry-first decision path
Use this sequence:
- Identify the exact battery or assembled pack.
- Obtain its approved charge voltage, profile, current, and temperature limits.
- Reject any charger that does not explicitly match those requirements.
- Confirm BMS activation and communication requirements for lithium.
- Only then investigate the cart connector and control system.
Check the Cart, Connector, Model Year, and Charging Controls
A charger plug can fit the receptacle yet fail to activate—or operate incorrectly. Mechanical fit and functional compatibility are separate questions.
Depending on the cart and charger, the connection may need to preserve:
- Correct positive and negative polarity
- A third-pin activation or sensing function
- An onboard-computer path
- A charge interlock
- Pack-voltage sensing
- BMS or cart-side control participation
It may form part of the electrical and control interface.
Named applications are a starting point, not a guarantee
| Cart family | Named applications found in charger listings | What still needs verification |
|---|---|---|
| Club Car | DS, Precedent | Model year, receptacle, onboard-computer involvement, conversion status |
| E-Z-GO | TXT, RXV | Model year, plug type, pin functions, factory charging architecture |
| Yamaha | G19, G22, G29, Drive, Drive 2 | Model year, receptacle generation, polarity, included adapter |
FORM organizes 48V 15A products by cart family, named model, and battery chemistry, including separate listings for Club Car DS/Precedent, E-Z-GO TXT/RXV, and several Yamaha applications. That product organization illustrates why equal voltage and current ratings do not make chargers interchangeable (FORM’s 48V charger collection).
Named applications do not establish compatibility with every model year, receptacle, battery conversion, or factory control arrangement. Likewise, a model-specific adapter may be sold separately rather than included with the charger.
Club Car onboard-computer considerations
Some Club Car charging systems involve an onboard computer or another cart-side control. This is a model- and year-dependent consideration, not a universal description of every Club Car.
Do not bypass a factory charging control based on generic internet instructions. A bypass can change charger activation or automatic shutoff, and the correct approach depends on the exact cart, receptacle, battery, and replacement charger.
Why an unloaded output test can mislead
Some automatic chargers must detect battery voltage before they activate. Others may require a third-pin signal or cart-side control participation. An unplugged charger connector showing no output does not necessarily prove that the charger has failed.
Before buying a charger or adapter, ask the seller or manufacturer:
- Is my exact make, model, and model year covered?
- Is the required plug included?
- If an adapter is needed, what is its part number?
- Does it preserve every required signal-pin function?
- Is polarity documented for this application?
- Does the charger depend on or bypass a factory charging control?
- Is it approved after my specific lithium conversion?
- Does the lithium pack require a BMS enable signal or communication?
- Is compatibility confirmed in writing?
The available listings do not support a definitive pinout or exhaustive model-year matrix. Use current cart, battery, and charger documentation for those details.
Choose the Amperage and Estimate Charging Time
Many cited full-charger listings use a 15A rating, but that does not make 15A universally ideal. The battery manufacturer—not charger-catalog popularity—sets the permitted charging current.
More amperage is not automatically better. Excessive current can violate battery specifications, while a very low-current maintainer may be impractical after routine traction use.
A rough charging-time formula
Use:
Charging hours ≈ pack amp-hours × depth of discharge ÷ charger amperage
Express depth of discharge as a decimal. A 70% discharge is 0.70.
Example: 225Ah pack at 70% depth of discharge
- Capacity to replace: 225Ah × 0.70 = 157.5Ah
- Divide by charger output: 157.5Ah ÷ 15A = 10.5 hours
Example: 225Ah pack at 40% depth of discharge
- Capacity to replace: 225Ah × 0.40 = 90Ah
- Divide by charger output: 90Ah ÷ 15A = 6 hours
These examples are simple arithmetic estimates before losses and later-stage current reduction (Battery Tender’s charge-time calculation examples).
Why actual charging takes longer
The formula assumes constant full current and perfect energy transfer. Actual charging may take longer because of:
- Electrical conversion losses
- Current taper during later charging stages
- Battery temperature
- Battery age and condition
- Imbalance between batteries or cells
- Lithium cell balancing
- Charger temperature control
- BMS intervention
- Initialization or diagnostic stages
Battery Tender states that its 15A PowerPlus typically takes approximately 8–12 hours for a fully depleted 48V pack. That manufacturer-stated range cannot be evaluated or transferred to another pack from voltage and charger amperage alone: battery capacity, starting state of charge, chemistry, and test conditions are also required.
In particular, do not apply the 8–12-hour statement to the 225Ah examples unless the manufacturer’s underlying pack capacity and conditions match. A truly empty 225Ah pack would require 15 idealized hours at a constant 15A before accounting for losses or taper, showing why capacity and depth of discharge cannot be omitted.
Fill-in calculation
- Pack capacity: _____ Ah
- Estimated depth of discharge: _ % ÷ 100 = ___
- Amp-hours to replace: _ Ah × = __ Ah
- Proposed charger current: _____ A
- Simple estimate: _ Ah ÷ A = __ hours
- Additional allowance for taper, losses, balancing, and conditions: required
If the estimated recovery window is too long, do not automatically buy the highest-amperage charger available. First verify the battery’s maximum charging current and the cart’s wiring, connector, and electrical requirements.
Full Charger, Maintainer, or Desulfator—and Onboard or Portable?
Product collections often mix complete chargers with maintainers, desulfators, harnesses, and receptacles. Read the equipment class and specifications carefully.
Know what the equipment does
- Full charger: Intended to restore substantial energy after ordinary cart use. The full-charger listings reviewed here commonly use a 15A rating.
- Maintainer: Lower-current equipment intended primarily to support a charged or lightly discharged battery during storage.
- Charger-maintainer: Can charge and then transition to maintenance, but recovery speed still depends on output current.
- Desulfator: Equipment intended for a suitable lead-acid application; it is not automatically a charger.
- Harness or receptacle: A connection component, not charging equipment.
BatteryMINDer lists a 48V 3A charger-maintainer-desulfator, a 2A maintainer-desulfator, and the OBD-48 standalone onboard desulfator. The OBD-48 is not a complete battery charger.
A 2A or 3A product may suit an approved storage application, but it will not recover a routinely discharged traction pack at the same rate as a 15A charger. For perspective, replacing 90Ah at an idealized constant 3A would take 30 hours before losses or taper.
Allied Lithium’s collection illustrates another catalog trap: it lists a 48V onboard lithium charger alongside replacement harnesses and cart receptacles that are accessories rather than chargers (Allied Lithium’s charger and accessory collection).
Onboard versus portable
| Use case | Usually favors | Main considerations |
|---|---|---|
| Overnight recovery after routine use | Full charger | Battery-approved profile and enough current for the available recovery window |
| Long-term storage | Documented maintainer or storage mode | Chemistry approval and explicit permission for extended connection |
| Permanent installation | Onboard charger | Secure mounting, cooling, exposure, cable routing, and service access |
| One charger shared among carts | Portable charger | Every cart must be genuinely compatible; increased handling and theft exposure |
| Lead-acid maintenance support | Appropriate maintainer or charger-maintainer | Chemistry-specific profile; not equivalent to rapid traction-pack recovery |
An onboard charger stays with the cart and reduces the need to carry a separate unit. Installation still requires attention to vibration, water and dust exposure, airflow, electrical isolation, cable protection, theft, and future service access.
A portable charger can be stored in a protected location and shared among genuinely compatible carts. Tradeoffs include repeated handling, plug wear, storage space, and the chance that one cart will need the charger while another is using it.
Weather ratings do not settle installation safety
Verify ingress protection in current product documentation. An IP67 or IP68 seller claim does not authorize installation in every wet, enclosed, hot, or debris-filled location. Follow the specified mounting orientation, clearances, cable requirements, and exposure limits.
Flooded lead-acid batteries can release flammable hydrogen while charging and therefore require adequate ventilation. A charger’s ingress or ignition-protection claim does not remove that battery-compartment requirement.
Can it remain connected?
Leave a charger connected during storage only when the documentation for the exact charger and installed battery chemistry expressly permits float, maintenance, or storage operation.
Do not infer that capability from the word “automatic.” Older manual-timer chargers and products without a chemistry-appropriate maintenance stage may need to be disconnected when charging is complete.
What 48V Chargers Cost: An Attributed Market Snapshot
Listing prices observed: August 14, 2026. Recheck every price, stock status, adapter, and product specification immediately before publication or purchase.
This is a snapshot of seller-listed products, not an independent quality ranking. Compare prices only within the same functional equipment class.
Full-charger listings
| Product or category | Stated chemistry and current | Installation or named applications | Displayed price | Possible extras and evidence limitations |
|---|---|---|---|---|
| Battery Tender PowerPlus 48V | Selectable lead-acid/LiFePO4; 15A | Onboard; separate adapters listed for selected Club Car, E-Z-GO, and Yamaha carts | $379.95; selected adapters $49.95 each | Chemistry support, maintenance mode, IP68 rating, and compatibility are manufacturer claims; availability can change |
| FORM 48V collection | Lead-acid, lithium, or multi-chemistry as individually labeled; 15A | Selected Club Car, E-Z-GO, and Yamaha applications; onboard option listed | $229.95 selected new lead-acid; $249.95 selected multi-chemistry; $199.95 onboard lithium; about $129.95–$139.95 refurbished | Plug type, algorithms, warranty, certification, and included hardware require direct confirmation |
| HTAXSCC marketplace listing | 48V/51.2V 16S LiFePO4; 58.4V output and 15A claimed | Advertised as onboard; no confirmed cart-specific connector in the supplied listing | $115.99 | Marketplace title supplies most specifications; price, inventory, connector, and application require verification |
| Allied Lithium 48V charger | Lithium; product link identifies a 15A model | Listed as onboard and waterproof | No price displayed | Collection page does not provide enough charging-profile, connector, warranty, or compatibility detail |
Maintenance and desulfation equipment
| Product or category | Equipment class | Current | Displayed price | Why it is not directly comparable with a 15A full charger |
|---|---|---|---|---|
| BatteryMINDer 483CEC1 | Charger-maintainer-desulfator for specified lead-acid, AGM, and gel systems | 3A | $326.70 | Lower-current maintenance-class product with a different intended role and recovery speed |
| BatteryMINDer 48021 | Maintainer-desulfator for specified lead-acid systems | 2A | $313.95 | Primarily intended for maintenance rather than routine traction-pack recovery |
| BatteryMINDer OBD-48 | Standalone onboard desulfator | Not presented as a complete charger | $124.39 | Not a battery charger |
Calculate the installed cost, not just the box price
The complete setup may include:
- Charger
- Model-specific adapter
- Replacement receptacle
- Charging harness
- Mounting brackets and hardware
- Protected AC connection or extension interface
- Cable protection and routing materials
- Electrical work
- Installation labor
- Shipping and taxes
A lower-priced charger that requires a new receptacle, custom mounting, or professional wiring can cost more than a higher-priced package with the correct hardware included.
Before ordering, record the date on which you checked the listing. Verify:
- Price and inventory
- Discounts and shipping terms
- Adapter availability
- Refurbished condition and warranty
- Return policy for installed electrical products
- Cable lengths
- AC input and circuit requirements
- Current certification claims
- Installation clearances
- Operating-temperature limits
- Replacement-cable availability
- Repair and technical support
- Whether plugs and adapters are included
There is no defensible overall winner from these listings. The products serve different functions, and comparable independent testing and complete specifications are unavailable.
Before Replacing It: A Safe No-Charge Troubleshooting Sequence
A silent charger does not automatically need replacement. The fault could be the outlet, GFCI, breaker, cord, connector, receptacle, battery pack, wiring, cart control, or charger.
Work from the outside in. Keep the investigation to low-risk external checks unless the exact manuals authorize a procedure and you have the appropriate training and tools.
Step 1: Verify AC power
- Test the outlet with a known-working lamp or another suitable device.
- Reset the GFCI once if it has tripped.
- Inspect the relevant breaker.
- If the breaker or GFCI trips again, stop rather than repeatedly resetting it.
- Try another correctly rated, known-working outlet only if the charger instructions permit it.
FORM’s troubleshooting guide likewise begins with the GFCI, breaker, and a known-working outlet before moving toward the cart (FORM’s charger troubleshooting sequence).
Step 2: Inspect cords, plugs, and the cart receptacle
With the charger disconnected from both AC power and the cart:
- Inspect AC and DC cords for cuts, crushed insulation, fraying, or heat damage.
- Look for dirty, bent, loose, recessed, or corroded connector pins.
- Check the cart receptacle for looseness, debris, discoloration, or burned material.
- Confirm that the plug seats normally without being forced.
- Do not probe energized connector pins.
Step 3: Check cart state and battery connections
Follow the cart manual for the required charging position, key state, parking brake, and Tow/Run setting. Procedures vary by model.
Visually inspect battery cables for:
- Correct series routing
- Loose terminals
- Corrosion
- Broken or damaged lugs
- Heat discoloration
- Improvised repairs
Do not tighten, remove, or reposition high-current battery cables unless the pack has been isolated according to the cart and battery service instructions.
Step 4: Identify the chemistry
Determine whether the pack is flooded lead-acid, AGM, gel, or lithium before attempting any battery-specific maintenance or low-voltage recovery.
Step 5: Measure total pack voltage only when appropriate
If the cart and battery manuals support the procedure and you are competent to use a properly rated digital multimeter:
- Disconnect the charger.
- Select the correct DC-voltage range.
- Confirm that the meter leads are in the correct ports.
- Measure only across the identified main pack-positive and pack-negative terminals.
- Keep jewelry, tools, and other conductive objects away from the battery bank.
- Compare the result with the exact battery and charger documentation.
A deeply discharged pack may fall below an automatic charger’s recognition voltage. The commercial guidance is inconsistent:
- FORM gives approximately 24V for a nominal 48V application.
- Impact Battery gives a usual range of approximately 30–35V.
- Golf Cart Garage gives a broad range of approximately 20–35V.
These figures should not be averaged or treated as a universal threshold. The exact charger manual should govern.
Measure receptacle voltage only when the cart documentation identifies the correct contacts and supports the procedure. If a manual says receptacle voltage should correspond with pack voltage but it does not, the receptacle, wiring, fuse, or cart-side control may require service.
Step 6: Cross-test with known-compatible equipment
When practical, either:
- Test the charger on another cart known to be compatible, or
- Test the affected cart with another charger known to match its battery, connector, polarity, and controls.
If a second compatible charger also fails on the cart, investigate the pack, receptacle, wiring, or cart control. If the original charger fails on another compatible cart, charger trouble becomes more likely. Golf Cart Garage recommends this form of cross-testing when separating charger faults from battery and cart problems (Golf Cart Garage troubleshooting FAQ).
Treat sounds and symptoms as clues, not verdicts
Clicking, silence, buzzing, early shutoff, and failure to shut off may guide the next check, but none conclusively identifies a failed component.
- No lights: Possible causes include no AC supply, a connection problem, low pack voltage, a missing activation signal, or charger failure.
- Repeated clicking: May reflect unstable connections, insufficient recognition voltage, or charger trouble.
- Early shutoff: May involve battery condition, connection resistance, temperature, control behavior, or the charger.
- Failure to shut off: May involve battery condition, the selected profile, sensing, or charger controls.
An unloaded connector-voltage reading is also inconclusive when the charger requires battery voltage or a control signal before activation.
Stop and call a technician when
Stop troubleshooting if you encounter:
- Swollen, cracked, leaking, or unusually hot batteries
- Uncertain polarity or undocumented wiring
- Burned wiring or melted connectors
- Repeated breaker or GFCI trips
- Exposed mains-voltage components
- A need to probe energized connector pins
- A need to open the charger
- Capacitor, transformer, diode, or internal wiring work
- A proposed onboard-computer or charging-control bypass
- A lithium pack that the BMS will not enable
- A recovery procedure not expressly approved by the battery manufacturer
Charger components can retain hazardous energy after disconnection. Internal diagnosis belongs with qualified service personnel using product-specific service procedures (Impact Battery’s discussion of internal charger hazards).
The Final Purchase Checklist
Use this checklist as the practical alternative to a one-size-fits-all product recommendation.
Battery-side checks
- [ ] Nominal pack voltage has been verified from labels and configuration.
- [ ] The exact battery chemistry is known.
- [ ] Current battery-manufacturer documentation is available.
- [ ] Required full-charge voltage and profile are documented.
- [ ] The charger expressly supports that chemistry and profile.
- [ ] Proposed current is within the battery manufacturer’s limit.
- [ ] Pack capacity in amp-hours is known.
- [ ] Estimated recovery time is acceptable.
- [ ] Charging-temperature restrictions are understood.
- [ ] Float or storage behavior is approved for the chemistry.
- [ ] Lithium BMS activation, temperature, and communication requirements are satisfied.
Cart-side checks
- [ ] Cart make, model, model year, and serial information are confirmed.
- [ ] The exact charging receptacle has been identified.
- [ ] The included plug or required adapter is confirmed in writing.
- [ ] Polarity is documented.
- [ ] Every required third-pin or signal function is preserved.
- [ ] Any onboard computer or cart-side charging control is accounted for.
- [ ] Compatibility remains valid after any battery conversion.
- [ ] No undocumented bypass is required.
Installation checks
- [ ] Onboard or portable use has been selected intentionally.
- [ ] The mounting location meets the charger manufacturer’s requirements.
- [ ] The charger can be secured against vibration and movement.
- [ ] Required cooling and clearances are available.
- [ ] Flooded-battery ventilation is adequate.
- [ ] The stated ingress protection suits the expected exposure.
- [ ] The AC supply and circuit meet the charger’s requirements.
- [ ] AC and DC cables can be routed away from heat, abrasion, and moving parts.
- [ ] The charger remains accessible for inspection and service.
- [ ] Mounting hardware and wiring materials are included or budgeted.
Commercial checks
- [ ] Required adapters and cables are included.
- [ ] Total delivered and installed cost has been calculated.
- [ ] Warranty terms have been read.
- [ ] Return eligibility after installation is understood.
- [ ] Current certification claims have been verified.
- [ ] Replacement cables and adapters are available.
- [ ] Repair support or service options are known.
- [ ] Technical support has confirmed the exact application.
- [ ] Refurbished condition and warranty are acceptable, if applicable.
- [ ] Written compatibility confirmation has been saved with the receipt.
Keep the old charger label, cart serial information, battery documentation, seller correspondence, and installation instructions. These records can help if the new charger does not activate or the cart is later converted to another battery.
The decision rule is straightforward: buy only when the battery-side charging specifications and cart-side connection requirements both explicitly match. An unresolved compatibility question is a reason to pause and contact the battery, cart, or charger manufacturer.
Frequently Asked Questions
Can I use any 48V charger on a 48V golf cart?
No. Nominal voltage is only one compatibility factor. The charger must also match the battery chemistry, required charge profile, maximum current, connector, polarity, cart model and year, and any signal-pin, onboard-computer, or BMS requirement.
A plug that fits physically does not establish electrical or functional compatibility. This is particularly important when a cart originally built for lead-acid batteries has been converted to lithium.
How long does a 15A charger take to charge a 48V golf cart?
You need the pack capacity and depth of discharge before estimating the time. Multiply pack amp-hours by the depth of discharge, then divide by 15A. Add time for losses, current taper, temperature, battery condition, balancing, and charger behavior.
Voltage and amperage alone are insufficient. A manufacturer’s charging-time range should not be transferred to a different pack unless capacity, chemistry, starting state of charge, and test conditions also match.
Can I leave a 48V golf cart charger plugged in during storage?
Only when the documentation for the exact charger expressly permits extended connection and confirms a maintenance or storage mode compatible with the installed battery chemistry.
Do not generalize that capability to every automatic charger. Older manual-timer chargers and products without an appropriate float or storage profile may need to be disconnected after charging.
Why does my 48V golf cart charger have no lights or fail to start?
Possible causes include:
- A dead outlet
- A tripped GFCI or breaker
- Damaged AC or DC cords
- Dirty, bent, or corroded connector pins
- A loose or failed receptacle
- Loose or corroded battery cables
- Pack voltage below the charger’s model-specific activation threshold
- A missing third-pin or cart-control signal
- A lithium BMS shutdown
- An internal charger fault
Check low-risk external items first. Published commercial startup thresholds differ substantially, so use the exact charger manual rather than assuming one universal minimum voltage. Cross-testing with known-compatible equipment can help separate charger trouble from a cart or battery problem.
Is a 48V battery maintainer or desulfator the same as a golf cart charger?
Not necessarily. A full charger is intended to replace substantial energy after normal cart use. A low-current maintainer generally supports a charged or lightly discharged battery during storage and may take too long to recover a routinely used traction pack.
A standalone desulfator is not a complete charger. Always confirm the equipment class, output current, supported chemistry, and intended use before ordering.
Shopping should not begin and end with a 48V label. Confirm the battery manufacturer’s charging requirements first, then verify the exact cart connector and control architecture, select an approved current and installation style, and calculate the complete setup cost.
If the existing charger is failing, work from the outlet toward the battery pack and rely on model-specific documentation rather than a universal voltage threshold. The better-documented choice is not automatically the cheapest, most powerful, or most broadly advertised charger; it is the one whose battery profile and cart interface are both explicitly confirmed.